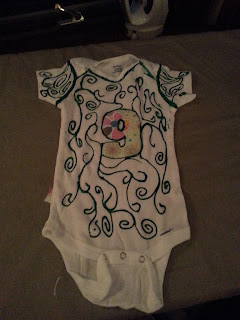
I loved the way they were personalized, how they turned out, and the idea behind them. They were by far the hit of the shower both times.
You will need:
1. Blank onesies in a variety of sizes: three size 0-3 mos, six size 3-9 mos, three size 12 mos. Walmart is where you can find the cheapest ones (about $8 a pack, and they actually come with 4 per package).
2. Fabric. I had 5 fat quarters, which I bought in a pack, also at Walmart, for $7. It was MORE than enough fabric, but having 5 designs gave people options and they all went together really well. You could probably do them all in 1 fat quarter if you use your fabric well and wanted them to all look alike.
3. Iron on adhesive web. It comes by the yard on a bolt from Pellon, also in the fabric section. This stuff can get expensive, but it was about $2 a yard at Walmart. You only need a half yard.
4. Number outlines. I made mine on MS Word using the Word Art section and printed on regular paper. I made them 4" tall, which I think is a perfect size. (If you want the exact same ones, the font is Aardvark size 300 pt.)
5. Pins- because you will want to pin the number, fabric, and adhesive together before you cut.
6. Scissors
7. Iron and board
8. Puff paint
9. Patterns for other shapes (optional)
Set Up:
Pin each number to a proper sized onesie. If you want people to be able to decorate any extras, set those out, too. I suggest hanging them with clothespins!
1. Pin the following items in this order:
number pattern piece
fabric (right side up)
Pellon with web side up (keep on the paper for now)
2. Cut out the number from all 3 layers at once.
3. Unpin the layers, removing the paper number and peeling the paper off of the web adhesive.
4. Make sure the web is lined up with the number as perfectly as possible, place on onesie, and iron it on!
5. Decorate with puff paint.
Nine was decorated by a high school boy. I was nervous at first, but he really had a great time and it turned out great!
Eleven is my favorite, and was done by baby's 17 year old uncle. So adorable!
I had some other shapes for another craft that we hijacked and used to make more onesies!
6. Let them dry overnight. I left them hanging, but you can also set them out on a flat surface to dry.
The great thing about these is that even if you make a mistake, they are homemade and so it is just part of the charm!


