Saturday, October 27, 2012

Card making

I am going to admit, my life changed for the better when we bought a Cricut at work. Now I felt like I can craft anything and not have to rely on my not-so-perfect handwriting.

I started by making invites for a baby shower I was co-hosting.


I just love the hippo.

OK, so nothing in the above picture was made on the cricut, but look at the cute giraffe decor my friend, Alyssa, made by hand! She is so cute. 

Then I realized when we had nothing to bring to a housewarming party that the Cricut sitting in my living room was just the touch I needed for a card. 

And a few baby showers...


And even just a pick-me-up card for my friend to give to her fiance during finals:


And only taking a few minutes to make sure cute cards made me more likely to make and give them! 

Tissue Paper Flower Centerpieces

Also for the wedding shower last spring, I needed some centerpieces. I found a great tutorial online (scroll down to the golf ball) for tissue paper flowers that I loved, so I decided to give it a shot. 

I gathered my materials and started making petals.


One episode of Castle later, I had enough to make centerpieces and also scatter as decor around the food area. 


I stapled some curling ribbon to the bottom of each flower and propped them in my vases (Dollar Tree), adding a bit of ribbon around the top to conceal the transition area.

Although it took a little while to make the flowers, the rest came together in about 20 minutes. (I made 12.) Not bad for an evening's work!

Mounted Photo Plaques

Last spring, we threw a wedding shower for my boss, Megan. My gift to her (and also some of the decor) were these cute plaques of her engagement photos (because we all get them done and then how often do they really get displayed?). 

I started by ordering 5*7 unfinished wooden plaques. You can get them anywhere, but I found them cheapest online (CreateForLess). I then got paint in her wedding colors using tester sizes at Home Depot, and printed out 5*7 photos at Walgreens while I was waiting to fill a prescription. Good crafters multi-task, after all. 

After painting the wood, I cut the photo corners to fit the shapes and used Mod Podge to affix and cover them. I prefer matte, but glossy would work, too. I had one extra and covered it in themed scrapbook paper.


Finally, I just stapled some ribbon to make hangers for each, Since they were so light, the ribbon will be able to hold them just fine, and I think it looks book. But using a regular picture hanger would work, too. 


I wish I had a picture of them being displayed on the wall, but alas, I never remember to capture pictures of my final work in action. I should make friends with a photographer so that my blog looks better. But you all get the idea!

Wedding Keepsake Shadowbox

My boss, Megan, got married this summer, as well. She has the cutest wedding that looked like it came straight from Pintrest. I kept a few of the things from it (program, CD they made, napkins they stamped) and arranged them for her in a shadowbox ($10 at Target). A great way to remember some of the big day!

Pacman Incentive Chart

This week, my friend Trena and I decided to have a crafting day. She is a 6th grade teacher with a homeroom of all boys. I am a former 6th grade teacher with a love of video games. It is like we were made to be friends.

I should let you all know, this was entirely Trena's idea. I just helped with execution. So, to motivate her homeroom to all come to school for 100% attendance days, she decided a little motivation would help. Also, video games.

We made this poster where every day there is 100% attendance, Pacman gets to chomp another bite. (Pacman is a magnet so he can always be repositioned. The rest of the poster will be laminated for reuse year after year.) You can see at certain points he gets donuts, pancakes, pizza, and at the end, there is an Xbox. When the students get to those days, they get a class party.

We also used the ghosts to guide the students on the path we want them to take so that it is perfectly spaced 5 days to the first party, 5 to the second, 10 to the third, and 10 to the fourth.

Hopefully when the kids see this on Monday, they will be excited and it will help to make sure that they are in school as much as possible!

Birthday Cards

This weekend I will be celebrating with 2 of my very special friends who have graced us with one more year of being awesome.

I decided to make "cards" for each of the ladies with a balloon theme.


First, I decided to make a cute balloon card for my dearest friend, Sarah, for her 30th. No need to dwell on numbers- it is just a cute card. Although I used a Cricut machine, I just made different sized circles out of colored paper and then cute little triangles to make the nubbins. Some string and a bit of glue later, this is what emerged!


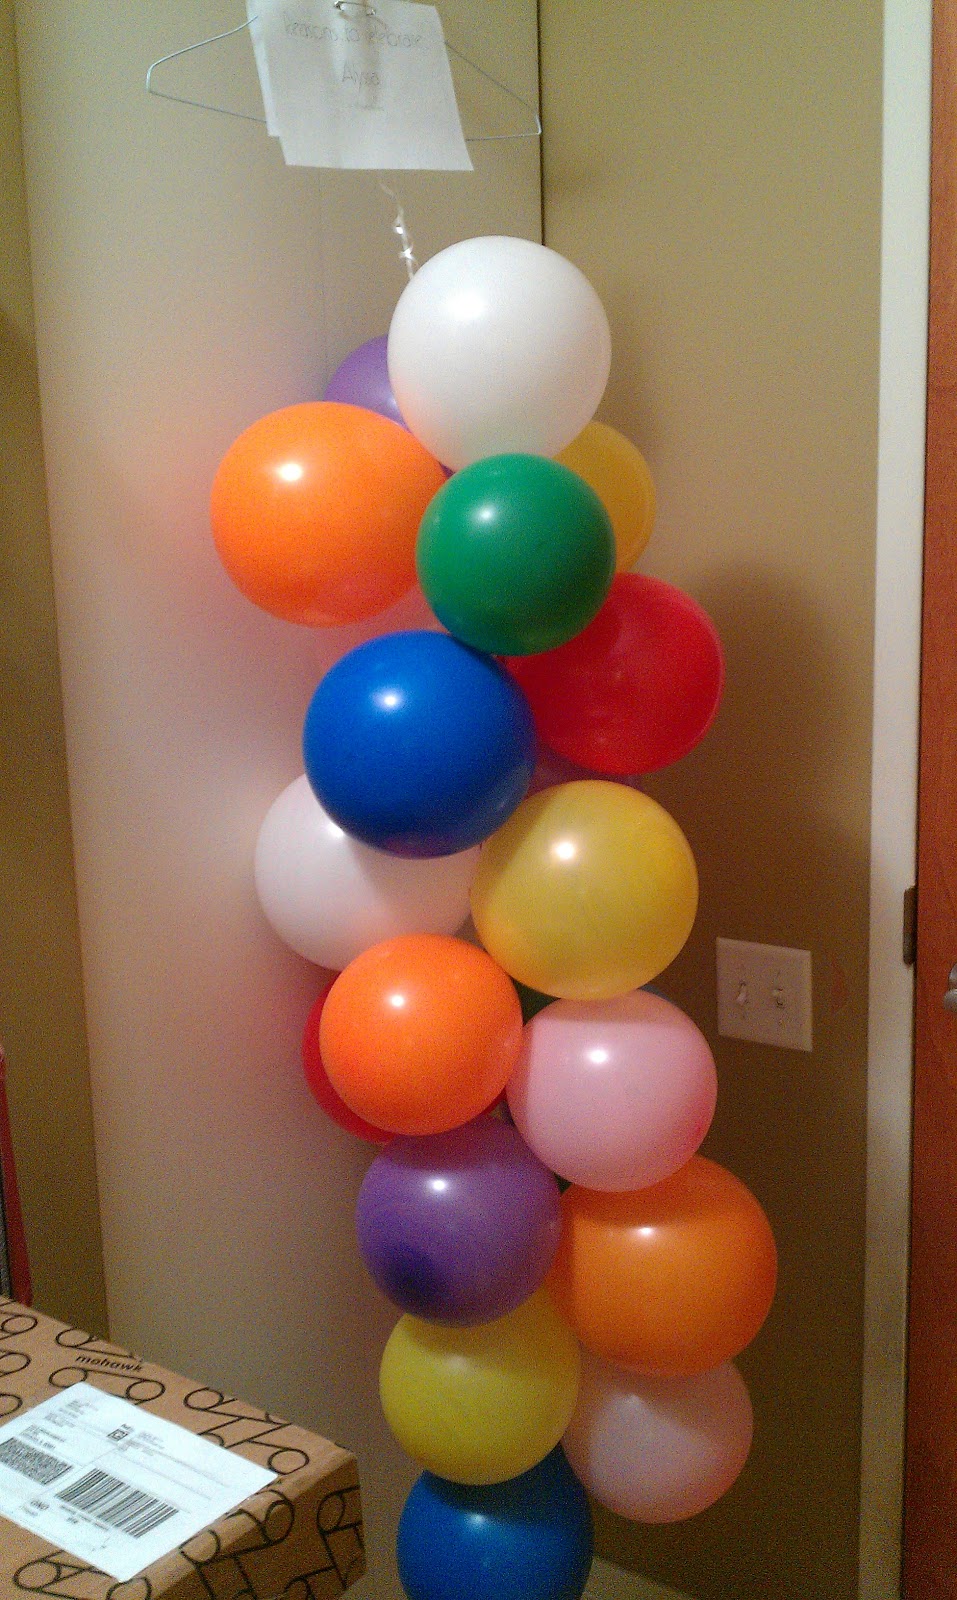
Next, I decided for Alyssa's 24th, she needed something a little more inspiring. So, I listed the 24 reasons we are celebrating her, printed them off on a cute font from my computer, and cut them up, sticking each one rolled up inside of a balloon.

Using balloon ribbon, I tied them all together and hung them from a hanger. Then I printed out a "card" to go on the top of the hanger. 

It said" Reasons to celebrate Alyssa: A 3D birthday card" and on the inside I wrote her a little note and told her to start popping!

When she "opens" the card, she will see 24 little notes of why I love her, which hopefully will help lift her spirits  (Get it, because balloons lift up? Well, helium ones do. You get it...)


Well, that is it! Happy birthday to my two wonderful ladies, and I hope that the rest of you feel inspired!

Saturday, October 13, 2012

Bridal shower advice from the heart

My sister-in-law had a bridal shower a few months ago, and it was totally cute. The ladies from her church who threw it have been doing these forever, and they are like Pintrest for pros.

One cute idea they used was to cut out little paper hearts and have the girls write words of advice for the bride and groom. With no real intention for what to do with them after the shower, I took over to make them a cute display.

I started by purchasing a 12*12 shadow box (from Target), 12*12 scrapbook paper in baby pink chevron, and the hearts from the shower.


After arranging the hearts, I grabbed some double sided tape and went to work affixing them to the paper.


I felt like something was still missing, so I grabbed a silver paint pen and added a little decorative detail to the center glass, 


and the couple's name 


and "Words to take to heart" quote to the frame. 


I think it gave it a nice, subtle finish to the project! 


Ok, so my photography could use some work, but I live in a 600 sq.ft. apartment with bad lighting. It is really cute in person, though! 

Thursday, September 27, 2012

Button escort cards

First, if you are looking for ivory tent cards, let me help you by saying the best you are going to find on short notice are at Office Depot. Unfortunately, getting them means you cannot do an easy Avery mail-merge, so I am going to quickly explain those steps below so you don't want to kill yourself as I thought about while getting this to work.

After printing these adorable cards (in Gatsby font), we decided to add a little extra decor by using the left over buttons from our table number craft.

Here is how they turned out!


And if you need help with the tech side of printing these, here you go! 

  1. Make a spreadsheet in Excel that has the names you want on each card so each cell is how you want it to appear on the escort card with the table number in the next column and save it. Make sure row 1 labels the columns as name and table number. (If you want both names on one card, put both names in one cell and the table number in the next column. If you want each person to have a card, put each person's full name in different cells with the table number for each person on the next column.) 
  2. Download the template at the Gartner website by using the SKU from your product package. 
  3. Open the template in MS Word. 
  4. Under the "mailings" tab, click "select recipients". Select existing document and find the Excel document where you saved the guest names. Select the sheet of the document (it is probably sheet 1) where the names are saved. 
  5. Select the sample text you want to replace with the guest's name (mine says "John Doe"). 
  6. In the mailings tab, select "insert merge field" and select "name" from the drop down. 
  7. Select the number 1 where it says Table 1, and from the "insert merge field" menu, select "table number". 
  8. Now go up next to the "insert merge field" button and find the "rules" drop down and select "next record". 
  9. Format this cell so that it looks how you want it to print. 
  10. Copy this cell and paste it to the others in the template where you want the names to print. Delete the other pages in the document. 
  11. Now you can preview the results and then print! Each card should have a different guest's name and their corresponding table number for you. 


Button table numbers

Here is the first craft we actually completed a few weeks ago for my sister-in-law's wedding. She wanted to include her husband-to-be's love of art, so we used 6 by 6 pulled canvases painted ivory as a base to glue our button numbers. They will be displayed on cute little 8" easels at each table!


If you are looking for a good place to get a massive amount of buttons, I recommend Little Red Cottage on Etsy. The ones above are sweetpea pink and we ordered 1000 (she was very sweet to do a custom order for us) and had enough to use them here and on the escort cards.

UP themed name tags

My sister-in-law is getting married in 9 days, and the rehearsal dinner is UP! themed. She had a great idea to do name tags with bottle caps, and here is how they turned out:


I am totally excited to see it come together with the other items we have been creating lately!

Tuesday, September 25, 2012

Craft blocks!

I got the inspiration from this post on Pintrest to display the family photos for my sister-in-law's wedding coming up in just 2 short weeks!


First, I found multiple sized wooden blocks at CraftParts.com. (I used the 5" size since we want to display them at the wedding and want them to be obvious in the space. I would suggest a 3" block for your home.)

Wanting to honor the bride and groom's parents and grandparents, we collected photos of each of their weddings and printed at Walgreens as 5 by 7 photos, and then cut those down to size. 

Some scrapbook paper and a little Modge Podge later, we had all the supplies we needed! 

I did use a friend's Cricut machine for the letters. Then we just printed the couple's names and relation to the bride and groom on one of the colored papers. 

The funny (punny?) part is that I got stuck with craft-block on this block-based project. I was having trouble getting the letters to stand out using such neutral-toned papers. A little black shadow fixed it and they came together really well!